• This is default featured slide 1 title

    Go to Blogger edit html and find these sentences.Now replace these sentences with your own descriptions.This theme is Bloggerized by Lasantha Bandara - Premiumbloggertemplates.com.

  • This is default featured slide 2 title

    Go to Blogger edit html and find these sentences.Now replace these sentences with your own descriptions.This theme is Bloggerized by Lasantha Bandara - Premiumbloggertemplates.com.

  • This is default featured slide 3 title

    Go to Blogger edit html and find these sentences.Now replace these sentences with your own descriptions.This theme is Bloggerized by Lasantha Bandara - Premiumbloggertemplates.com.

  • This is default featured slide 4 title

    Go to Blogger edit html and find these sentences.Now replace these sentences with your own descriptions.This theme is Bloggerized by Lasantha Bandara - Premiumbloggertemplates.com.

  • This is default featured slide 5 title

    Go to Blogger edit html and find these sentences.Now replace these sentences with your own descriptions.This theme is Bloggerized by Lasantha Bandara - Premiumbloggertemplates.com.

নেটওয়ার্ক এর কাজ শিখুন কম্পিউটার ছাড়াই :: c class দিইয়া networking ( SUB NETTING)

আজকের বিষয়ঃ c class দিইয়া networking   ( SUB NETTING)

SUBNETTING কি ????
সহজ কথায় subnetting  হল আপনি যখন একটি অফিস এ ভিন্ন ভাবে  ২/৩/৪/৫/৬/৭/৮/.........। টি নেট তৈরি করতে যাবেন তখন আপনার subnetting   দরকার  আপনি subnetting   ছাড়া ভিন্ন ভাবে নেট তৈরি করতে পারবেন না। তাহলে দেখা যাক subnetting   কীভাবে করে ??

C CLASS SUBNETTING :

192.168.10.0  এটি একটি C class ip  আপনারা জানেন । এই C class ip কে এখন subnetting    করব ঠিক এ ভাবে
192168100
৮ টি বিট৮ টি বিট৮ টি বিট৮ টি বিট
১২৮+৬৪+৩২+১৬+৮+৪+২+১=২৫৫
মোট বিট ৮+৮+৮+৮= ৩২ বিট এবং একটি বিট ভাঙলে নেট হয় ২৫৬ টি
০ হল নেট অ্যাড্রেস আর ২৫৫ হল broad cast address  তাই ০ এবং ২৫৫  কে হিসেব করা হয় না তাই নেট দরা হয় ২৫৪ টা
এখন আমরা ৩ টা বিট নিব ১২৮+৬৪+৩২+১৬+৮+৪+২+১
১২৮+৬৪+৩২= ২২৪
এখান থেকে ৩ টি বিট নিলাম যার মান হল ২২৪  আর বাকি ৫ টি বিট রেখে দিলাম । কেন ৩ টি বিট নিলাম ??
আমি নেট অ্যাড্রেস তৈরি  করব ৮ টি তাই আমাকে এই সুত্র মনে রেখে নেট অ্যাড্রেস  তৈরি করতে হবে
  • N= 2N ( 2 POWER N)  এটা নেট এর সুত্র
  • N= 2 3 (Cube) ( ২ পাওয়ার ৩)
  • N= 8
আর host ( computer  এর সংখ্যা) হবে
Host= 2 power n - ২  এখানে ( n=5)   কারন ৮-৩=৫
= ২ power ৫-২
= ৩২-২
= ৩০
তাহলে আমরা একটি নেট অ্যাড্রেস এ পাচ্ছি ৩০ টি কম্পিউটার যুক্ত করার ক্ষমতা । তাহলে নেট range হবে  ২৫৬-২২৪= ৩২

তার মানে আইপি গুলু হবে:

  • ১৯২.১৬৮.১০.০
  • ১৯২.১৬৮.১০.৩২
  • ১৯২.১৬৮.১০.৬৪
  • ১৯২.১৬৮.১০.৯৬
  • ১৯২.১৬৮.১০.১২৮
  • ১৯২.১৬৮.১০.১৬০
  • ১৯২.১৬৮.১০.১৯২.
  • ১৯২.১৬৮.১০.২২৪
লক্ষ্য করুন মোট নেট ওয়রক অ্যাড্রেস তৈরি হইছে ৮ টি
প্রতিটি নেট এর distance  হচ্ছে ৩২ করে ২ টা আইপি বাদ দিলে ৩০ টি host পাব
১৯২.১৬৮.১০.।০------- ১৯২.১৬৮.১০.৩০
৩০ টি host  পাব
তারপর ১৯২.১৬৮.১০.৩২----- ১৯২.১৬৮.১০.৬৪
৩০ টি host  পাব
এ ভাবে মোট ৮ টি নেট অ্যাড্রেস থেকে ৩০*৮= ২৪০ টি host  যুক্ত করতে পারব
Share:

নেটওয়ার্ক এর কাজ শিখুন কম্পিউটার ছাড়াই :: Cable এর পরিচিতি

আজকের বিষয়ঃ cable  এর পরিচিতি

আমরা যদি নেটওয়ার্ক এর কাজ করতে যাই  তা হলে  আমাদের প্রথমে কেব্‌ল সম্পর্কে দারনা থাকতে হবে  আমরা নেটওয়ার্ক এর জন্য ২ দরণের cable connection  use করব
  • Cross Cable connection
  • straight cable connection

Cross Cable connection:

এই কেব্‌ল টির নাম  CAT5 cable  এটি আপনি বাজারে  কিনতে পাবেন  যার দাম হচ্ছে ১ ফুট = ২০-৩০ টাকা
Cross Cable connection  দিয়া কাজ করতে হয় তখনই যখন same device connection করতে হয়।

same device কী কী ?

  • Router থেকে  pc
  • pc--------pc
  • Switch----- switch
  • hub-----hub
  • hub------switch
  • router----- router
আপনি যদি পিসি থেকে আর একটি পিসি connect করতে চান তাইলে আপনাকে Cross Cable connection এর মাধ্যমে connect করতে হবে   কারন পিসি থেকে পিসি একটি same device.
আর যদি সুইচ থেকে পিসি connect করতে চান তাইলে আপনাকে straight cable connection এর মাধ্যমে connect করতে হবে
কারন সুইচ  আর পিসি ভিন্ন device

ভিন্ন device কী কী ?

  • pc  থেকে  switch
  • pc-------hub
  • switch-----router
  • hub----router
এই ভিন্ন ডিভাইস নিয়া কাজ করতে চাইলে আপনাকে straight cable connection এর মাধ্যমে connect করতে হবে
কেব্‌ল connection করতে হয় কী ভাবে তা পরে জানতে পারবেন
cable connection  করতে হলে আপনের cat cable এবং  RJ 45  connector   লাগবে

RJ 45  connector  কী?

এটি কে বলে RJ 45  connector  যার দাম ১৫-২০ টাকা  ভালো হল TPLINK এর টা  আমি নিজে use করছি। কেব্‌ল  connection দিতে হলে আপনাকে নিচের  colour coding টি মুখস্ত রাখতে হবে  কারন cable এর ভিতর ৮ টি তার আছে   যার  ৪ টি pair আছে

দেখুনঃ

এই সুত্র straight cable connection এর জন্য

  • White Orange + Orange
  • White green +Blue
  • White Blue+Green
  • White Brown +Brown

এই সুত্র Cross Cabling :

  • White Green +Green
  • White Orange +Blue
  • White Blue + Orange
  • White Brown + Brown
Share:

নেটওয়ার্ক এর কাজ শিখুন কম্পিউটার ছাড়াই [পর্ব-০৪] :: Private IP এর অবস্থা

আজকের বিষয়ঃ  Private IP এর অবস্থা

  • A class  শুরু হবে  (১০.০.০.০)
  • B class  শুরু হবে ( ১২৭.১৬.০.০--- ১২৭.৩১.০.০।)
  • C class শুরু হবে   ( ১৯২.১৬৮.১০.৫)

HOST FORMULA:  (HOST মানে নেটওয়ার্ক )

H= 2n-2      (এখানে n=8)
=  28-2     (এখানে ২x2x2x2x2x2x2x2= 256)    এটা কে আমরা  2 power 8  বলবো
= 256-2
=254

NETWORK FORMULA:

2n ( 2 power  n)

মনে রাখার বিষয়:  (1)

আমরা  কখন ও    ০ ,১২৭,২৫৫ কে আইপি হিসেবে দরতে পারব না
  • কারন  ০ হল নেটওয়ার্ক অ্যাড্রেস
  • ১২৭ হল লুপ অ্যাড্রেস
  • ২৫৫ হল  broadcast address

মনে রাখার বিষয়:(2)

আইপি ২ ধরনের ০১ .  private ip  02. public ip
আমরা যখন অফিস এ বাসায়  নেটওয়ার্ক করি তখন আমরা private ip use করি
আমরা যখন public  থেকে বের হয়ে ইন্টারনেট  connected  হই তাখন আমরা আর  private a  থাকি না তখন আমরা চলে যাই public ip তে
একটি private ip দেখি
  • ১৯২.১৬৮.১০. ০  ( এটা কে বলবো নেটওয়ার্ক অ্যাড্রেস কারন ০ দিয়া শুরু)
  • ১৯২.১৬৮.১০.১  ( একে বলবো ১ম আইপি)
  • ১৯২.১৬৮.১০.২ ( একে বলবো ২য় আইপি)
  • ১৯২.১৬৮.১০.৩
  • ১৯২.১৬৮.১০.২৫২
  • ১৯২.১৬৮.১০.২৫৩
  • ১৯২.১৬৮.১০.২৫৪ ( last ip)
  • ১৯২.১৬৮.১০.২৫৫ ( broadcast address )
আজ এই পর্যন্ত
Share:

নেটওয়ার্ক এর কাজ শিখুন কম্পিউটার ছাড়াই [পর্ব-০২] :: আই পি ভাঙ্গা

মনে রাখার বিষয়:

  • router  দিয়েই  নেটওয়ার্ক এর কাজ  আরাম্ব হয়
  •  আপনি যখন ২ টি পিসি রেখে ৩ টি পিসি তে নেটওয়ার্ক করতে যাবেন তখন  Router ছাড়া এটা সম্ভভ না
  •  router   কাজ করে আই পি নিয়ে    আর   Switch কাজ করে Mac address  নিয়ে
বীঃদ্র   router   /Switch   একটি ডিভাইস    আর Mac address  একটি আই পি এর মত নাম্বার

আজকের বিষয়ঃ   আই পি ভাঙ্গা

আপনি যতই পণ্ডিত হন না কেন নেটওয়ার্ক এ  আই পি ভা ঙ্গা না জানলে আপনি নেটওয়ার্ক এর কাজ জানেন না এটা আমি বলব তাই আইপী ভাঙা শিখুন। আইপি ভাঙ্গাতে  হলে আপনাকে একটি সূত্র মণে রাখতে হবে  তা হল
১২৮+৬৪+৩২+১৬+৮+৪+২+১=২৫৫
একটি কথা মনে রাখতে হবে এই যোগফল ২৫৫ এর বেশী যেতে পাড়বে না

একটি আই পি ভাঙ্গা দেখুন:

১৯২ =  ১২৮+৬৪+০+০+০+০+০+০=১৯২
মনে রাখতে হবে একটি আইপি ৪ টি  octate দিয়ে গঠিত হয়। প্রতিটি octate এ ৮ টি বিট (Bit) থাকে
Bit 1 192Bit 2 16Bit 3 254Bit 4 1
প্রতি  অকটেট এ ৮ টি করে   বিট (Bit) থাকে
তাহলে এখন ১৬ কে ভাঙ্গি এই সূত্র দরে (১২৮+৬৪+৩২+১৬+৮+৪+২+১=২৫৫)
1286432168421
00010000
তাহলে আইপি হল ১৬ এর ০.০.০.১.০.০.০.০= ১৬
একটি কথা মনে রাখতে হবে যখন value এর মান না পাওয়া যাবে তাখন এর মান হবে ০ আর পাওয়া গেলে মান হবে ১
Share:

আই পি ভাঙ্গা

১৯২.১৬৮.১০.২১   এদের বলে   decimal এবং 1.0.0.1.0.1.0.1 এদের বলে  Bynary
192168102
৮ টি করে বিট৮ টি করে বিট৮ টি করে বিট৮ টি করে বিট
ওপরে খেয়াল করুন
৪ টি octate  দিয়ে একটি আইপি হয়েছে  প্রতিটিoctate  এ ৮ টি করে বিট আছে  ।তাহলে ৮x৪=৩২ টি বিট দিয়া একটি আইপি হয় ।। তাহলে আমরা  decimal আইপি কে  Binary আইপি তে ভাঙ্গি  এভাবে

ব্যাখ্যাঃ

১২৮+৬৪= ১৯২ হয় তাই এদের  value এর জন্য ১.১ হয় আর বাকি ০+০+০+০+০+০  এর জন্য ০.০.০.০.০.০ হয়েছে তাই bynary হবে1.1.0.0.0.0.0.0
ঠিক একই ভাবে
128+0+32+0+8+0+0+0= ১৬৮
  • ১২৮ এর কারনে ১
  • ০ এর  কারনে ০
  • ৩২  এর  কারনে ১
  • ০ এর  কারনে ০
  • ৮ এর  কারনে ১
  • ০এর  কারনে ০
  • ০ এর  কারনে ০
  • ০ এর  কারনে ০
তাই bynary হবে 1.0.1.0.1.0.0.0
ঠিক একই ভাবে
0+0+0+0+8+0+2+0=১০
  • ০ এর  কারনে ০
  • ০ এর  কারনে ০
  • ০ এর  কারনে ০
  • ০ এর  কারনে ০
  • ৮ এর  কারনে ১
  • ০ এর  কারনে ০
  • ২ এর  কারনে ১
  • ০ এর  কারনে ০
তাই bynary হবে 0.0.0.0.1.0.1.0
ঠিক একই ভাবে
0+0+0+0+0+0+2+0=২
  • ০ এর  কারনে ০
  • ০ এর  কারনে ০
  • ০ এর  কারনে ০
  • ০ এর  কারনে ০
  • ০ এর  কারনে ০
  • ০ এর  কারনে ০
  • ০ এর  কারনে ০
  • ২ এর  কারনে ১
  • ০ এর  কারনে ০
তাই bynary হবে 0.0.0.0.0.0.1.0
এই আইপি ভাঙ্গা যদি একটি আপনি শিকতে পারেন তাহলে হাজার হাজার আইপি ভাঙতে পারবেন  আর আইপি ভাঙেতে পারলেই  আপনি নেটওয়ার্ক এর BOSS.
Share:

How To Open Broadband Business Anywhere in Bangladesh

আসসালামুওালাইকুম, কেমন আছেন সবাই? আসা করি সকলেই ভালো আছেন। আমিও ভালো আছি এবং আপনাদের দোয়ায় আমার Networking Solution Service এর কাজ খুব ভালোই চলছে। আজ অনেক দিন পরে আবারো আপনাদের মাঝে একটি টিউন করার জন্য হাজির হলাম। এবার আসি কাজের কথায় বেশ কিছু দিন আগে আমি টেকটিউনসে ২টা টিউন করেছিলাম, টিউনের নাম ছিল

Broadband And Wifi Internet Business Service

এবং

Broadband And Wifi Internet Networking Business Service

তো বিষয়টা নিয়ে অনেকেই আমার সাথে আলোচনা করেছে আসা করি আমি তাদের সকলকেই  সঠিক তথ্য দিতে পেরেছি আর যদি না দিতে পারি তাহলে আমাকে ক্ষমা করবেন কারন আমি আপনাদের কোন উপকারে আসতে পারিনি। আজ তার পরেও আমি আবার বিষয়গুলো নিয়ে বিস্তারিত আলোচনা করছি।

এখন আমি আপনাদের সাথে Networking / Internet এর business আপনি আপনার এরিয়াতে কীভাবে করবেন তা নিয়ে বিস্তারিত আলচনা করবো। আপনি যদি আপনার এরিয়াতে Networking / Internet এর business করতে চান তাহলে আপনাকে প্রথমেই যা করতে হবে তা নিচে ধাপে ধাপে আমি বর্ণনা করছি।
১। প্রথমেই আপনাকে খবর নিতে হবে যে আপনার এরিয়াতে কোন ISP Company (Internet Service Providers Company) আছে কিনা। যদি থাকে, তাহলে আপনি তাদের সাথে যোগাযোগ করে আপনার এরিয়াতে Local Area Distributor হিসাবে তাদের থেকে আপনার Bandwidth নিতে হবে। এখন আপনাদের অনেকের মনেই প্রশ্নআসতে পারে যে, Bandwidth কি?
উত্তরঃ ১. একটি নির্দিষ্ট ব্যান্ড এর মধ্যে ফ্রিকোয়েন্সি পরিসীমা, বিশেষ করে যেটা একটি সংকেত প্রেরণের জন্য ব্যবহৃত।
২. 'ব্যান্ডউইথ' একটি নির্দিষ্ট সময়ের মধ্যে ওয়েবসাইট বা ইন্টারনেট  তথ্য সেবা থেকে আপনার কম্পিউটার স্থানান্তরিত করা যেতে পারে এবং  যা এর হার বর্ণনা করে। যখন আপনি কোন ওয়েব পেজ খোলেন, ফাইল ডাউনলোড করেন, তখন ব্যান্ডউইথ আপনার ইন্টারনেট কার্যকলাপ দক্ষতা এবং গতি পরিমাণ  নির্ধারণ করে। সাধারণত ব্যান্ডউইথ কখনও কখনও 'প্রতি সেকেন্ডে বিট' বা 'প্রতি সেকেন্ডে বাইট' হিসাবে পরিমাপ করা হয়।
৩. সহজ কথায় বলতে গেলে আমাদের ভাত খাবার জন্য যেমন চাউল এর প্রয়োজন তেমনি ইন্টারনেট, ব্রাউজিং, ডাউনলোড করার জন্য ব্যান্ডউইথ প্রয়োজন।
তো আপনারা ব্যান্ডউইথ এর জন্য Bangladesh ISP Company List. এই লিংক এ গেলে বিভিন্ন ISP Company (Internet Service Providers Company) এর Address & Contact number পাবেন সেখান থেকে আপনারা আপনাদের এরিয়া অনুযায়ী ISP Company (Internet Service Providers Company) এর সাথে Contact  করে আপনার এরিয়াতে যে ISP Company টা আছে তাদের থেকে Bandwidth Connection নিয়ে নিতে পারেন।
অথবা, আপনারা যদি মনে করে থাকেন যে, এই ব্যান্ডউইথ আপনারা ISP Company (Internet Service Providers Company) এর সাথে Contact  করে manage করতে পারছেন না তাহলে আপনারা এই ব্যাপারে সাহায্যের জন্য আমাদের সাথে যোগাযোগ করতে পারেন, আমরা বাংলাদেশের মধ্যে যে কোন জায়গাতেই আপনাদের Bandwidth Manage করে দিতে পারবো। Bandwidth Manage এর জন্য আমাদের কাছ থেকে সাহায্যের পেতে আপনাদের যা করতে হবে তা হলে আপনার নাম মোবাইল নাম্বার সহ আপনি কত MB Bandwidth নিতে চান তা উল্লেখ করে আপনার সম্পূর্ণ ঠিকানা (রোড নং, গ্রাম, ডাক ঘর টিউন কোড, থানা, জেলা) সহ আমাদের ইমেইল করুন trstnetwork@gmail.com অথবা আমাদের ফেসবুক ফেন পেজে টেক্সট করে পাঠান TRST Network
২। ISP Company এর সাথে যোগাযোগ করে Bandwidth Connection তো নিয়ে এলেন এখন কি করবেন? এখন আপনাকে যা করতে হবে তা হোল Networking অথবা আপনার ইউজারদের মধ্যে Bandwidth Distribute করার জন্য  আপনার কিছু Device কিনতে হবে।আমি  Device গুলোর নাম এবং কিছু সংক্ষিপ্ত বর্ণনা সহ নিচে ধাপে ধাপে উল্লেখ করছি আপনাদের সুবিধার জন্য।
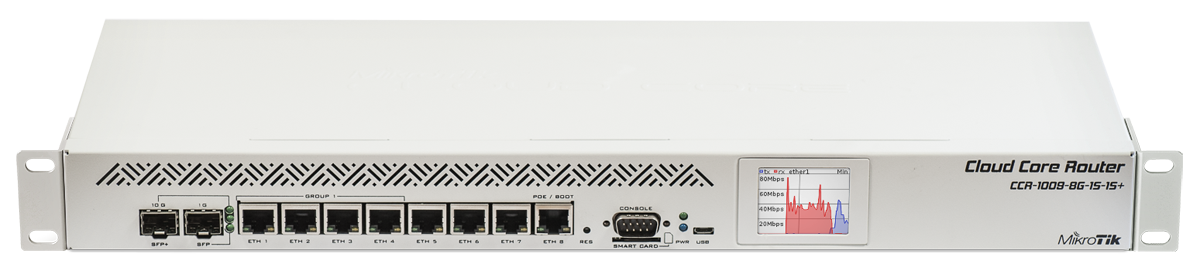
MikroTik
১. MikroTik Router Board:  MikriTik টা সাধারনত আপনার Bandwidth Manage এবং ইউজারদের Bandwidth Distribute করার জন্য ব্যবহার হয়। আপনি কোন ইউজার কে কত MB Bandwidth দিবেন, কত MB Speed Limit দিবেন, কত MB Data Limit দিবেন তার সব কিছুই আপনারা এই MikriTik এর মাধ্যমে Manage করতে পারবেন। সম্পূর্ণ আপনার User Management বলতে যা কিছু বোঝায় তার সবকিছুই আপনি MikriTik দিয়ে করতে পারবেন। বাজারে আপনারা বিভিন্ন দামের এবং মডেলের MikriTik পাবেন। MikriTik এর বাজার মূল্য ৫০০০ টাকা থেকে শুরু করে ১৫০০০০ টাকা পর্যন্ত এবং এর চাইতেও বেশি দামের MikriTik আপনারা বাজারে পাবেন।
Fiber Optic Cable
২. Fiber Optic Cable: এই Cable ব্যবহার হয় সাধারনত মেইন লাইন টানার জন্য। ISP Company থেকে মেইন লাইন টানার জন্য এবং আপনাদের MikroTik এর LAN port থেকে Local Area Networking এর জন্য এই Cable ব্যবহার হয়। এই Cable এর এক একটা core দিয়ে এক একটা নেটওয়ার্ক বিন্যাস করা যায়। এই ক্যাবলে তামার তারের চেয়ে কাচকে মিডিয়া হিসেবে ব্যবহার করা হয়েছে। ফলে ইলেকট্রো ম্যাগনেটিক ইন্টারফের‌্যান্স নেই। এই ক্যাবলের ডাটা ট্রান্সমিসন স্পীড অনেক বেশী। ফাইবার অপটিক ক্যাবল দুই ধরনের হয়ে থাকে। সিঙ্গল মোড ফাইবার এন্ড মাল্টিমোড ফাইবার। বর্তমানে বাজারে 4 core এর Fiber Optic Cable এর মূল্য প্রতি মিটার ১৪ টাকা। এছাড়াও আপনারা বাজারে আরও অনেক বেশি core এর Fiber Optic Cable পাবেন...।।
Twisted Pair Cable/ UTP Cable
৩.Twisted Pair Cable/ UTP Cable: এই Cable সাধারনত সুইজ থেকে ইউজারদের কম্পিউটার পর্যন্ত ইন্টারনেট কানেকশন দেওয়ার জন্য ব্যবহার হয়। ট্যুইস্টেড পেয়ার ক্যাবল দুই দরনের হয়ে থাকে। ১. শিল্ডেড ট্যুইস্টেড পেয়ার ক্যাবল, ২.আনশিল্ডেড ট্যুইস্টেড পেয়ার ক্যাবল।

·         শিল্ডেড ট্যুইস্টেড পেয়ার ক্যাবল

শিল্ডেড ট্যুইস্টেড পেয়ার ক্যাবলে প্রতিটি ট্যুইস্ট জোড়া থাকে একটি করে শক্ত আচ্ছাদনের ভেতর। ফলে ইলেকট্রিক ইন্টারফের‌্যান্স অনেক কম থাকে। এই ক্যাবলের ডাটা ট্রান্সফার স্পীড ৫০০ এমবিপিএস হয়ে থাকে।

·         আনশিল্ডেড ট্যুইস্টেড পেয়ার ক্যাবল

আনশিল্ডেড ট্যুইস্টেড পেয়ার ক্যাবলে পেয়ারের বাইরে অতিরিক্ত কোন শিল্ডিং থাকে না কেবল বাহিরে একটি প্লাষ্টিকের জেকেট থাকে। এই ক্যাবলের ডাটা ট্রান্সফার রেট ১৬ এমবিপিএস।


Switch
৪. Switch: Switch ব্যবহার করা হয় Local Area Network এর মধ্যে ছোট ছোট পপ করার জন্নে। Twisted Pair Cable/ UTP Cable বা Fiber Optic Cable বেশ কিছুদুর টানার পরে একটা নির্দিষ্ট এরিয়াতে বেশ কিছু ইউজার কে একটা UTP Cable অথবা Fiber Optic Cable এর একটা চরে থেকে কানেকশন দিতে এই Device ব্যবহার করা হয়। সুইজ হলো একাধিক পোর্ট বিশিষ্ট ব্রিজ।ইহা প্রতিটি নোডের ম্যাক এড্রেস এর তালিকা সংরক্ষন করে। ইহা ওএসআই মডেল এর ডাটালিংক লেয়ারে কাজ করে।
Media Converter
৫. Media Converter: Fiber Optic Cable এর একটি Core কে Splice Machine এর দ্বারা Patch Cord এর দ্বারা এই Device এর সাথে Connect করে Ethernet Port এ Convert করার জন্য Media Converter ব্যবহার করা হয়। এই Device use করলে Ethernet Speed বেড়ে যায়।
Patch Cord
৬. Patch Cord: Fiber Optic Cable এর একটি Core কে Splice Machine এর দ্বারা Patch Cord এর সাথে Joint দিয়ে ব্যবহার করা হয় Media Converter এর সাথে Connect করার জন্য।

৭. Splice Machine: Fiber Optic Cable এর Core Joint এর কাজে Splice Machine ব্যবহার হয়।
Router
৮. Router: Router use করা হয় Mobile Device গুলতে WiFi use করার জন্য। ইউজারা সাধারনত তাদের ঘরে Mobile, Laptop অথবা অন্য কোন WiFi Enable Device এ Internet use করার জন্য Router ব্যবহার করে থাকে।

Radio Device
৯. Radio Device: এই Device গুল ব্যবহার করা হয় Long Rang WiFi Zone করার জন্য। এই Device গুল দুই ধরনের হয় একটা 2.4GHZ এবং 5GHZ এর হয়ে থাকে। 2.4GHZ এর Device দিয়ে আমরা Long Rang WiFi Zone করতে পারি কারন আমাদের দেশের WiFi Enable Device গুল 2.4GHZ এর বেশি Support  করতে পারে না। আপনারা যারা Long Rang WiFi Zone করতে চান তারা এই Device এর মাধ্যমে Maximum 1KM এরিয়া WiFi Zone করতে পারবেন। এছাড়াও আপনারা এই Device গুলর মাধ্যমে 50+KM Distance এ Bandwidth Through করতে পারবেন। Long Distance এ Bandwidth Through/Received করার জন্য 5GHZ এর Device ব্যবহার করা সবচাইতে বেশি ভালো।

এখানে আপনারা যারা আপনাদের এরিয়াতে ব্রডব্যান্ড ব্যবসা Cable কানেকশন দিয়ে করতে চান তাহলে (Mikrotik Routerboard, Fiber Optic Cable, Twisted Pair Cable/ UTP Cable, Router, Switch, Computer) এই Device গুল ব্যবহার করবেন এবং আপনি যদি আপনার এরিয়াতে ব্রডব্যান্ড ব্যবসা WIFI Connection দিয়ে করতে চান তাহলে আপনার (Mikrotik Routerboard, Computer, Router, Radio Device m2) এই Device গুল ব্যবহার করবেন।
৩। Bandwidth Connection চলে আসলো Device কেনা হয়ে গেল এবং Device সম্পর্কে কিছু ধারনাও হয়ে গেল। এখন আপনি ব্যবসা করবেন কীভাবে বা আপনার এরিয়ার Clint দের Internet Connection কীভাবে দিবেন, কীভাবে তাদের ১টি নির্দিষ্ট Speed Limit দিবেন, কিভাবে MikroTik Configure করবেন? এটা নিয়ে আপনার চিন্তা করার কোন কারন নেই এজন্য আমরা আপনাকে সাহায্য করবো। আমরা আপনার Networking এর সব কিছু Setup করে আপনাকে শিখিয়ে দিবো যে কীভাবে আপনাকে Networking করতে হবে এবং কীভাবে আপনি আপনার Clint দের Service দিতে পারবেন।
Share:

Windows 10 এর ফন্ট সমস্যার সহজেই সমাধান নিন।

আসসালামুয়ালাইকুম। আশা আপনারা সবাই ভালো আছেন। আজ আমি টিউন করছি Windows 10 এর ফন্ট সমস্যা নিয়ে। আমি যে সিস্টেম টা দেখাব সেটা খুবই সহজ। প্রায় সবাই জানেন। তবুও বিষয়টি নিয়ে লিখছি। কাজের কথাইঃ
প্রথমেই আপনাদের ডাউনলোড করতে হবে Shonar Bangla নামের Unicode Font। ডাউনলোড লিঙ্ক - এখানে  এবার এটাকে Install করে নিন।
আমরা প্রধারনত মজিলা বা অন্যান্য ব্রাউজার ব্যবহারে বেশি সমস্যায় আছি তাই আপনাদের মজিলা ফায়ারফক্সে এর সমাধানটা আগে দেখাই-
Menu ber থেকে Tools=> Option=> Content=> Default font এ Shonar bangla সিলেক্ট করুন।
এবার রিস্টার্ট দিন মজিলা ফায়ারফক্সকে।
এ ছা ড়া ও মা ই ক্রো স ফ ট অ ফি সে এ ই ফ ন্ট সি লে ক্ট ক রে বে শ সু ন্দ র ক রে   Unicode টা ই প ক র তে পা র বে ন।
Share:

How to Update Windows Defender Offline? Install Latest Virus Definition Files Manually

Windows Defender is a free anti-malware tool from Microsoft which can be used to improve your computer system security. Initially it was released with the name "Microsoft AntiSpyware" for Windows XP and Windows Server 2003 but later it was renamed to Windows Defender. Windows Defender was released for Windows XP and Server 2003 as a free antispyware program. Later it came included with Windows Vista and Windows 7 operating systems.
Microsoft has also included Windows Defender with Windows 8 and Windows 8.1 and now it provides similar protection as Microsoft Security Essentials (MSE).
But there is a small issue with Windows Defender. It downloads and installs its latest virus definition updates using "Windows Update" program. Many times users can't use Windows Update or don't want to use Windows Update, in such situations they are unable to update Windows Defender with the latest virus definition files.
There might be another situation. If you don't have an Internet connection in your computer system, you can't update Windows Defender as it requires Internet connectivity to download the virus definition files.
To overcome this problem, today in this topic we are going to share official download links for latest virus definition updates for Windows Defender program. These links will allow you to download latest virus definition files which can be stored locally on your computer system or on a USB drive. After that you can manually install those virus definition updates in your computer system or any other computer system and you'll no longer need an Internet connection or access to Windows Update to update Windows Defender.
If you also want to update Windows Defender offline and install its latest virus definition updates manually, just download them using following links:
Once you download the file, run the downloaded .EXE file and it'll automatically install the latest virus definition files and will update Windows Defender offline without using Internet connection or Windows Update.
NOTE: The above mentioned links should be used for Windows XP, Vista and Windows 7 only. If you are using Windows 8 or Windows 8.1, you'll need to download the virus definition updates using the links given in following tutorial as Windows Defender in Windows 8 and 8.1 uses same virus definitions as Microsoft Security Essentials program:
Share:

How to connect Nokia X, Nokia XL, Nokia X2 to PC running Windows XP & use USB tethering

Nokia-XL-Dual-SIM-jpgThis has been asked by many of you, so we searched for it and may be this works for you. You can connect your Nokia X, Nokia X+, Nokia XL or Nokia X2 to PC running Windows XP and even tether or use your devices as internet modem over USB.
You need to install tethering driver manually by following below steps,
  1. Save the attached zip file to your Windows XP computer and then unzip it.
  2. Use USB cable to connect your phone to your computer. No need to select any USB mode.
  3. On the phone, tap Settings to open the Settings menu.
  4. Tap Mobile data and networks, scroll down and tap Mobile hotspot.
  5. Check USB tethering, the status will change from USB Connected to Tethered.
  6. When Windows XP’s New Hardware Wizard opens on computer, select No, not at this time and click Next.
  7. Select Install from a list or specific location and click Next.
  8. Click Browse to browse to the directory where you saved the driver which downloaded in Step 1 and click Next.
  9. When Windows XP finishes installing the driver, click Finish. (You could find Remote NDIS interface under Network adapters in Device Manager.)
  10. Now computer network connection is valid and you can join it without any other configuration.
  11. If you want to deactivate tethering, just uncheck USB tethering and then network sharing will be stopped.
Share:

How to Repair Corrupted Windows System Files with the SFC and DISM Commands

blue screen of death
The System File Checker tool built into Windows can scan your Windows system files for corruption or any other changes. If a file has been modified, it will automatically replace that file with the correct version.
If the SFC command doesn’t work, you can use the DISM command on Windows 10 or Windows 8 to repair the underlying Windows system image. On Windows 7 and earlier, Microsoft offers a downloadable “System Update Readiness Tool” instead.
When You Should Run These Commands
Run this command when troubleshooting a buggy Windows system. If Windows is blue-screening, applications are crashing, or some Windows features just aren’t working properly, the SFC command may be able to fix this. Even if the SFC command doesn’t repair any files, running it will confirm that no system files are corrupted and you can continue to troubleshoot your system with other methods.
You shouldn’t normally have to run the DISM command. However, if the SFC command fails to run properly or can’t replace a corrupted file with the correct one, the DISM command or System Update Readiness Tool can fix the underlying Windows system and make SFC run correctly.

Run the SFC Command to Repair System Files

You’ll need to do this from and Administrator Command Prompt window. To open one on Windows 10 or 8.1, right-click the Start button and select “Command Prompt (Admin)”. On all versions of Windows, you can also search the Start menu for Command Prompt, right-click it, and select Run as Administrator.
Type the following command into the Command Prompt window and press Enter to run a full system scan:
sfc /scannow
Leave the Command Prompt window open until the command completes — this may take some time. If everything is fine, you’ll see the message “Windows Resource Protection did not find any integrity violations.”

Run the DISM Command to Fix SFC Problems
If you see a “Windows Resource Protection found corrupt files but was unable to fix some of them” message, try rebooting into Safe Mode first. On Windows 10, 8.1, or 8, hold the Shift key while clicking the Restart option toaccess the advanced boot options menu. On Windows 7 or earlier, reboot your computer, and then press and hold the F8 key while it’s booting up. Run the sfc /scannow command from within Safe Mode.
On Windows 10, 8.1, and 8, the Deployment Image & Servicing Management tool can fix component store corruption that prevents the SFC command from working properly.
To run this command, open a Command Prompt as administrator. Type the following command and press Enter. DISM will check your Windows component store for corruption and automatically fix any problems it finds.
DISM /Online /Cleanup-Image /RestoreHealth
Allow the command to finish running before closing the Command Prompt window. This may take five to ten minutes. It’s normal for the progress bar to stay at 20 percent for a while, so don’t worry about that.
If the DISM command changed anything, restart your computer afterwards. You can now run the SFC command again and it would be able to replace any corrupted files with the correct ones.
On Windows 7 and earlier, the DISM command isn’t available. Instead, you can download and run the “System Update Readiness Tool” from Microsoft and use it to scan your system for problems and attempt to fix them.

Try System Restore or a System Reset

If you’re still experiencing system problems and these tools can’t help, you can try more drastic actions. Running the System Restore tool will restore your Windows operating system files to an earlier state, and this may fix system corruption problems if the operating system wasn’t damaged at that earlier point.
There’s always just performing a system reset or reinstalling Windows, too. On Windows 10, 8.1, and 8, you can perform a “Reset this PC” operation to reset Windows to its default state. You’ll have to reinstall your programs after, but you won’t lose any personal files. On Windows 7 and earlier, this will require using your computer’s manufacturer-provided recovery partition or reinstalling Windows from scratch.

If you encounter other errors while running the above commands, try searching the web for the errors you encounter. The commands will often point you to log files with more information if they fail, too — check the log files for more details about specific problems. Ultimately, it may not be worth troubleshooting serious Windows corruption problems when you can just reset Windows to its default state or reinstall it.
The above commands also have other options, too. For example, you can have the SFC command check only a single Windows file for corruption and repair it. You can have the DISM command perform a quick check for system corruption without repairing it, or provide a WIM or ESD file containing Windows operating system files.
Share:

Popular Posts

Powered by Blogger.

Translate

Labels

Recent Posts

Unordered List

  • Lorem ipsum dolor sit amet, consectetuer adipiscing elit.
  • Aliquam tincidunt mauris eu risus.
  • Vestibulum auctor dapibus neque.

Pages

Theme Support

Need our help to upload or customize this blogger template? Contact me with details about the theme customization you need.